Unlocking the Mystery of Perfect Hard-Boiled Eggs
Have you ever embarked on the seemingly simple task of boiling an egg, only to be met with disappointment? Perhaps your egg whites turned out disappointingly rubbery, or the yolk was either still runny, dry, crumbly, or marred by an unappetizing green ring. And let's not even start on the frustration of peeling, where half the egg white stubbornly clings to the shell, ruining your culinary masterpiece before it even begins. If these scenarios sound all too familiar, you're not alone. Many home cooks find themselves asking
how to cook perfect hard boiled eggs every time – a goal that seems deceptively difficult for such a staple food.
The truth is, achieving truly perfect hard-boiled eggs – those with tender, set whites and smooth, creamy yolks that peel effortlessly – requires a specific approach. It’s not just about throwing eggs into boiling water and hoping for the best. This comprehensive guide will demystify the process, providing you with a step-by-step, foolproof method to ensure your hard-boiled eggs are consistently delicious and picture-perfect for deviled eggs, salads, or just a healthy snack.
The Science Behind Your Hard-Boiled Egg Struggles
Understanding
why hard-boiled eggs often go wrong is the first step to getting them right. It all comes down to temperature and how eggs cook from the outside in. The egg white and the egg yolk have different ideal cooking temperatures, and exceeding these can lead to undesirable results.
*
Egg Whites: These coagulate and set beautifully at around 180°F (80°C). If they cook at temperatures much higher than this, or for too long, the proteins tighten excessively, leading to that unpleasantly rubbery texture.
*
Egg Yolks: For a wonderfully creamy and smooth texture, yolks are best cooked between 158°F (70°C) and 170°F (75°C). Pushing past 170°F (75°C) causes them to become dry, crumbly, and often develop a tell-tale greenish-grey ring around the outside. This green discolouration is ferrous sulfide, a harmless but unappealing compound formed when iron from the yolk reacts with sulfur from the white due to overcooking at high temperatures.
The core challenge lies in the fact that you can't easily measure the internal temperature of an egg while it's cooking inside its shell. Furthermore, a large temperature difference between the cold egg and rapidly boiling water can lead to uneven cooking and cracked shells. Many culinary experts have experimented to find the sweet spot, balancing internal temperature needs with practical, at-home cooking methods. The goal is always the same: perfectly set, yet tender whites, moist and creamy yolks, and shells that practically slide off.
Choosing Your Eggs: Freshness, Type, and What Matters
Before you even think about the cooking process, consider the star ingredient: the egg itself. Does the type or age of an egg truly make a difference when you're aiming to
cook perfect hard boiled eggs every time?
*
Freshness: If you're lucky enough to have backyard chickens, use those fresh eggs! They undeniably taste superior and have tighter yolks and whites that hold their shape beautifully when sliced, making for stunning presentations in dishes. However, paradoxically,
very fresh eggs are notoriously harder to peel. This is because the inner membrane adheres more strongly to the shell. For the easiest peeling, many chefs actually recommend using eggs that are 7-10 days old, as the pH changes over time, causing the membrane to separate more readily from the shell. Don't worry, even older grocery store eggs are perfectly fine for boiling and eating, even if their yolks tend to sit a bit closer to the shell wall.
*
Shell Color: Brown eggs or white eggs – does it matter? Absolutely not! The color of the eggshell is determined by the breed of chicken and has no impact on taste, nutritional value, or how well the egg will hard-boil.
*
Egg Type: While chicken eggs are the most common, you can certainly hard-boil other types of eggs if you have access to them. Duck eggs, quail eggs, or turkey eggs can all be hard-boiled, but you'll need to adjust cooking times based on their size. A larger duck egg, for instance, will require a few more minutes than a standard chicken egg.
Ultimately, while very fresh eggs offer superior flavor and presentation, if easy peeling is your top priority, opt for eggs that aren't straight from the nest.
The Foolproof Method: How to Cook Perfect Hard-Boiled Eggs Every Time
Now for the moment you've been waiting for! This step-by-step method integrates the science of egg cooking with practical, time-efficient techniques to ensure soft whites, creamy yolks, and easy-to-peel results. Say goodbye to rubbery whites and green rings!
Step 1: Start Cold and Covered
Place your eggs in a single layer at the bottom of a pot. Make sure there’s enough space so they don’t crack by knocking into each other. Cover the eggs with cold water by about one inch. Adding cold water means the eggs heat up gradually with the water, reducing the risk of cracking and promoting more even cooking. For an extra measure against cracking, you can add a pinch of salt to the water – some believe it helps strengthen the shells, while others find it helps seal any small cracks that might form.
Step 2: Bring to a Rolling Boil
Place the pot on high heat and bring the water to a full, rolling boil. You’ll see plenty of large, active bubbles. It's important to monitor this closely, as the timing starts the moment the water reaches this stage.
Step 3: Remove from Heat and Cover
As soon as the water reaches a vigorous boil, immediately remove the pot from the heat source. Do *not* lift the lid. Cover the pot tightly with its lid. This step is crucial for controlled cooking. The residual heat in the water will gently cook the eggs to perfection without overdoing the whites or yolks.
Step 4: Let Them Rest (Timing is Key!)
This is where you determine your preferred yolk consistency. Set a timer based on your desired doneness:
*
6-7 minutes: For a soft-boiled egg with a runny yolk (perfect for dipping toast!).
*
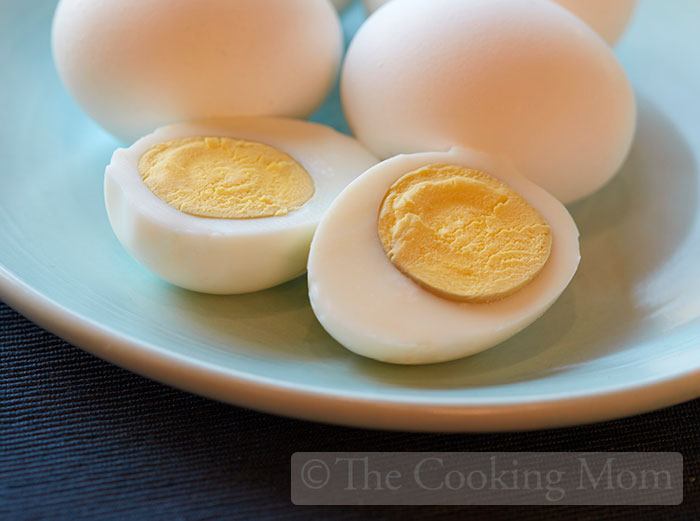
8-9 minutes: For a jammy, still-creamy yolk that’s set but not dry. This is often considered the ideal for a "hard-boiled" egg that's truly creamy.
*
10-12 minutes: For a firm, fully set yolk. Even at 12 minutes, using this method, the yolk should remain creamy and avoid the dreaded green ring.
Step 5: Immediate Ice Bath
Once your timer goes off, promptly transfer the eggs from the hot water to an ice bath. This step is non-negotiable for
easy peel eggs and preventing overcooking. A bowl filled with ice and cold water stops the cooking process instantly, preventing the formation of the green ring and causing the egg to contract, which helps separate the membrane from the shell. Let them sit in the ice bath for at least 5-10 minutes, or until completely cool.
Step 6: Peel Under Running Water (Optional but Recommended)
Once the eggs are thoroughly chilled, it's time to peel. Gently tap the wide end of the egg on a hard surface to create a crack, then roll it to crack the rest of the shell. Peel the egg under cold running water. The water helps to get under the membrane, making the peeling process incredibly smooth and minimizing lost egg whites.
Step 7: Store Properly
Peeled hard-boiled eggs should be stored in an airtight container in the refrigerator and consumed within 5-7 days. Unpeeled hard-boiled eggs can also be stored in the fridge for up to a week.
Troubleshooting & Tips for Hard-Boiled Egg Mastery
Even with a reliable method, sometimes things don't go perfectly. Here are some common issues and how to solve them:
*
Green Ring on Yolk: This is a classic sign of overcooking. The iron and sulfur react when exposed to high heat for too long. Ensure you stick to the recommended resting times and, crucially, transfer eggs immediately to an ice bath.
*
Rubbery Whites: Again, usually a sign of overcooking. The method of removing from heat after boiling helps prevent the whites from seizing up. If your whites are still rubbery, try reducing your resting time by a minute.
*
Cracked Shells: Starting with cold water and bringing it to a boil gradually minimizes thermal shock. Adding salt to the water can sometimes help, but ultimately, some cracks are unavoidable. Don't worry, the egg is still perfectly safe to eat!
*
Difficulty Peeling: This is almost always due to very fresh eggs or not shocking them sufficiently in an ice bath. For very fresh eggs, let them sit in the fridge for a week before boiling for easier peeling. Ensure the ice bath is genuinely cold and the eggs chill for the full 5-10 minutes.
With this knowledge and a bit of practice, you’ll be making
perfect hard-boiled eggs every time. These versatile gems are fantastic for quick snacks, adding protein to salads, or crafting crowd-pleasing deviled eggs. For more insights on perfecting your egg dishes, explore how to cook perfect hard-boiled eggs every time - Article 2 which delves into alternative cooking methods, or learn creative ways to use your perfectly cooked eggs in how to cook perfect hard-boiled eggs every time - Article 3.
Conclusion
Mastering the art of the perfect hard-boiled egg might seem daunting, but by understanding the science and following a precise, controlled cooking method, you can consistently achieve eggs with tender whites, creamy yolks, and shells that practically melt away. No more rubbery textures, no more green rings, and certainly no more frustrating peeling experiences. Embrace these steps, and you'll be well on your way to hard-boiled egg perfection for all your culinary adventures.